Introducing the Circuit class
The Circuit class is designed to make actually building circuits easier. In
particular, it manages wires for you, including any attaching and detaching that may be
necessary.
Note
I’m still not happy with the Circuit interface, and hope to clean it up more in
future with automatic wire routing between more than one terminal. For now, this is
what we have.
Below I’ve adapted the code we had at the end of the Adding wires section to use
Circuit.
class CurrentShunt(Scene):
    def construct(self):
        r1 = Resistor().rotate(90 * DEGREES)
        r2 = Resistor().rotate(90 * DEGREES).shift(2 * RIGHT)
        isource = CurrentSource().rotate(90 * DEGREES).shift(2 * LEFT)
        top_node = Node().shift(UP)
        bottom_node = Node().shift(DOWN)

        r1.set_label("R_1")
        r2.set_label("R_2")
        isource.set_current("I_0")

        c = (Circuit(r1, r2, isource, top_node, bottom_node)
             .connect(isource.right, top_node.left)
             .connect(r1.right, top_node.down)
             .connect(r2.right, top_node.right)
             .connect(isource.left, bottom_node.left)
             .connect(isource.left, bottom_node.left)
             .connect(r1.left, bottom_node.up)
             .connect(r2.left, bottom_node.right))

        self.add(c)
Note in particular that we’ve done away with those calls to attach() as well
as the update_mobjects() call, as Circuit handles both of these for us. The
result is as below.
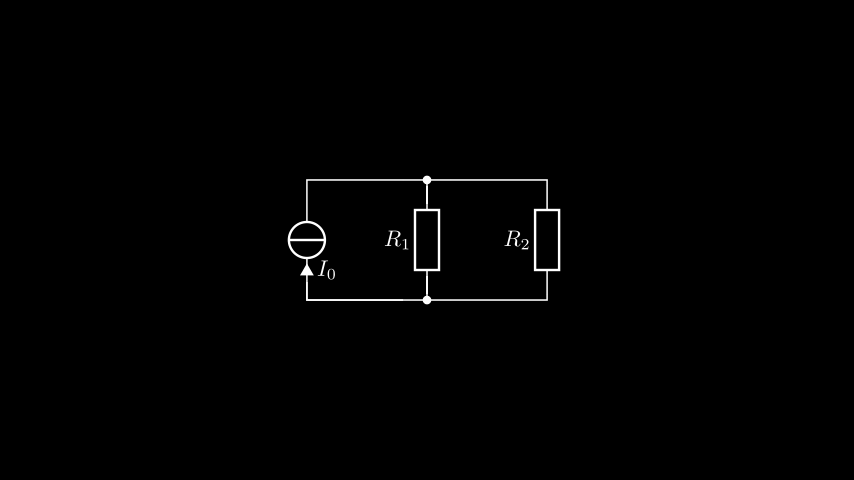
It’s just like before, but without having to worry about the particular idiosyncrasies of how manim-eng does things. Much easier!
We’re almost done now — we’ve just got to add the remaining voltage and current labels.