Adding wires
Wires
There are two types of wire in manim-eng:
Wire, which routes itself automatically; andManualWire, which requires manual specification of routing points.
We’ll use Wire, as it’s much simpler and easier (and is almost always all you
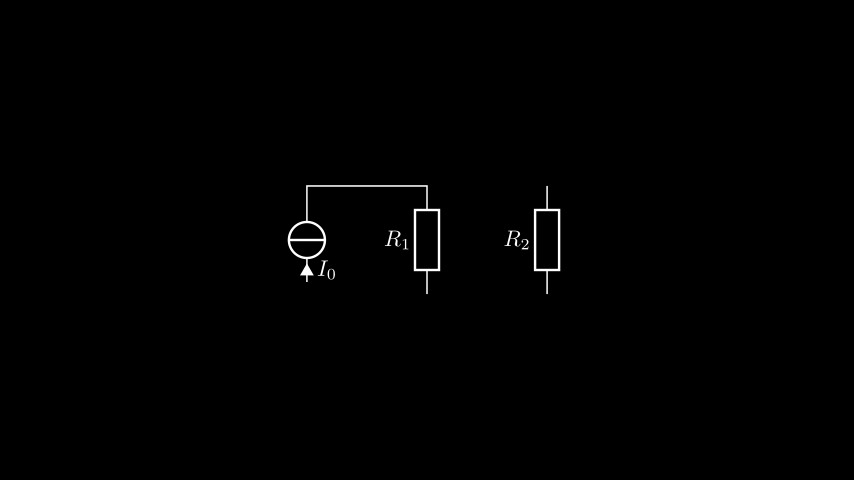
need). First, we’ll connect just two terminals, to get a feel for things. The wire
interface is very simple — simply pass the two terminals you wish to connect, and it
does the rest.
class CurrentShunt(Scene):
    def construct(self):
        r1 = Resistor().rotate(90 * DEGREES)
        r2 = Resistor().rotate(90 * DEGREES).shift(2 * RIGHT)
        isource = CurrentSource().rotate(90 * DEGREES).shift(2 * LEFT)

        r1.set_label("R_1")
        r2.set_label("R_2")
        isource.set_current("I_0")

        self.add(r1, r2, isource)
        self.add(Wire(isource.right, r1.right))
Note
The terminal naming is based on when a component is horizontal, and does not change as the terminal is rotated. Since we rotated the components by 90 degrees anticlockwise, the terminal on the top is the one that used to be on the right.
We can then connect the rest together in the same way.
class CurrentShunt(Scene):
    def construct(self):
        r1 = Resistor().rotate(90 * DEGREES)
        r2 = Resistor().rotate(90 * DEGREES).shift(2 * RIGHT)
        isource = CurrentSource().rotate(90 * DEGREES).shift(2 * LEFT)

        r1.set_label("R_1")
        r2.set_label("R_2")
        isource.set_current("I_0")

        self.add(r1, r2, isource)
        self.add(
            Wire(isource.right, r1.right),
            Wire(isource.left, r1.left),
            Wire(r1.right, r2.right),
            Wire(r1.left, r2.left),
        )
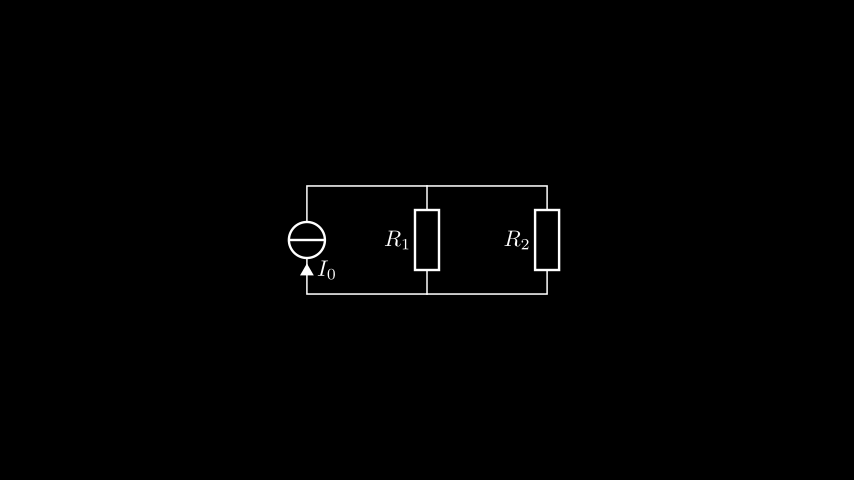
This is starting to look pretty good! But there’s something not quite right about those
intersections — they need a solder blob. For this, we have to turn to the other key
player in manim-eng wiring and wire routing — the Node.
Nodes
Nodes have two main purposes in manim-eng:
Managing multi-wire intersections, including automatic solder blobbing; and
Representing external connections to a circuit.
We’re going to be using them for their first purpose here. Before we begin, a few further remarks about nodes are in order:
Unlike normal components, nodes add terminals as they need them, and terminals can be added in any direction; and
When acting as an intersection, they automatically add and remove solder blobs depending on the number of connected wires.
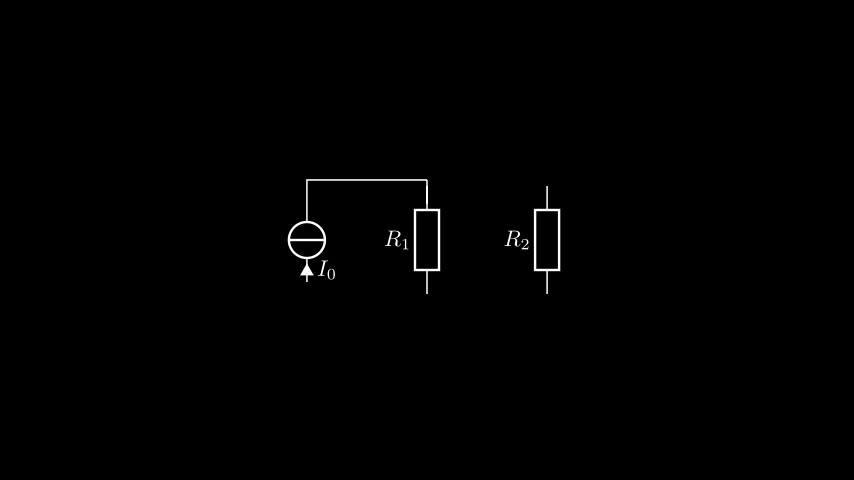
We’ll add one node first, just connecting the current source and R1 for now.
class CurrentShunt(Scene):
    def construct(self):
        r1 = Resistor().rotate(90 * DEGREES)
        r2 = Resistor().rotate(90 * DEGREES).shift(2 * RIGHT)
        isource = CurrentSource().rotate(90 * DEGREES).shift(2 * LEFT)
        top_node = Node().shift(UP)

        r1.set_label("R_1")
        r2.set_label("R_2")
        isource.set_current("I_0")

        self.add(r1, r2, isource, top_node)
        self.add(
            Wire(isource.right, top_node.left).attach(),
            Wire(r1.right, top_node.down).attach(),
        )
You may notice the extra method call of attach() — this is tells the wire to
tell the terminals it is attached to them. For most terminals this doesn’t matter, but
nodes’ terminals are only visible when something is attached — we just need to tell
the terminals that something is attached to them! This gives us the below.
Let’s add in the third connection to the top node.
class CurrentShunt(Scene):
    def construct(self):
        r1 = Resistor().rotate(90 * DEGREES)
        r2 = Resistor().rotate(90 * DEGREES).shift(2 * RIGHT)
        isource = CurrentSource().rotate(90 * DEGREES).shift(2 * LEFT)
        top_node = Node().shift(UP)

        r1.set_label("R_1")
        r2.set_label("R_2")
        isource.set_current("I_0")

        self.add(r1, r2, isource, top_node)
        self.add(
            Wire(isource.right, top_node.left).attach(),
            Wire(r1.right, top_node.down).attach(),
            Wire(r2.right, top_node.right).attach(),
        )

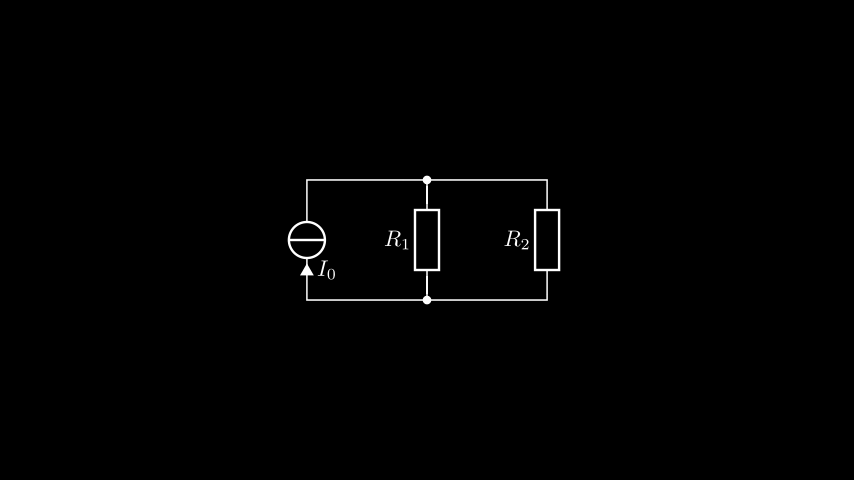
Hang on a minute — wasn’t the whole point of this to get a solder blob? Well, yes, but
there’s a problem — nodes use updaters to introduce or remove solder blobs, which
run every animation frame. The problem is that our current project is a still frame, and
so updaters never get run. We’ve just got to add one extra line:
self.update_mobjects(0).
class CurrentShunt(Scene):
    def construct(self):
        r1 = Resistor().rotate(90 * DEGREES)
        r2 = Resistor().rotate(90 * DEGREES).shift(2 * RIGHT)
        isource = CurrentSource().rotate(90 * DEGREES).shift(2 * LEFT)
        top_node = Node().shift(UP)

        r1.set_label("R_1")
        r2.set_label("R_2")
        isource.set_current("I_0")

        self.add(r1, r2, isource, top_node)
        self.add(
            Wire(isource.right, top_node.left).attach(),
            Wire(r1.right, top_node.down).attach(),
            Wire(r2.right, top_node.right).attach(),
        )
        self.update_mobjects(0)
The update_mobjects
method requires a delta time dt to pass to time-dependent animations. We don’t have
any of those, so we just pass 0. Our result is then what we expected.

Note
We could’ve updated the node directly using the below.
top_node.update()
Using the update_mobjects method means that when we add the second node we don’t
have to add a second updating line.
Speaking of adding the second node, let’s do just that!
class CurrentShunt(Scene):
    def construct(self):
        r1 = Resistor().rotate(90 * DEGREES)
        r2 = Resistor().rotate(90 * DEGREES).shift(2 * RIGHT)
        isource = CurrentSource().rotate(90 * DEGREES).shift(2 * LEFT)
        top_node = Node().shift(UP)
        bottom_node = Node().shift(DOWN)

        r1.set_label("R_1")
        r2.set_label("R_2")
        isource.set_current("I_0")

        self.add(r1, r2, isource, top_node, bottom_node)
        self.add(
            Wire(isource.right, top_node.left).attach(),
            Wire(r1.right, top_node.down).attach(),
            Wire(r2.right, top_node.right).attach(),
            Wire(isource.left, bottom_node.left).attach(),
            Wire(r1.left, bottom_node.up).attach(),
            Wire(r2.left, bottom_node.right).attach(),
        )
        self.update_mobjects(0)
Doesn’t that look good! Now, that was a lot of work, so we’re now going to take a look
at a way of doing this more easily — the Circuit class.